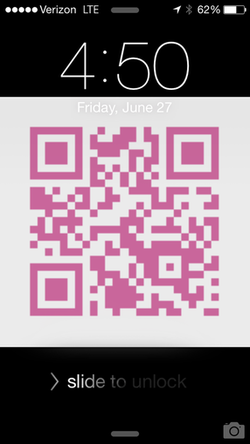
 Are you a first time ISTE attendee? If so, here are a few packing tips that have been helpful for me in years past. One of the most important things to keep in mind is that the conference is packed full of sessions, events, vendors, people to meet and more. To max out your time, you need to take care of YOU, first. I do this by coming prepared. Here are a few items you may want to throw into your suitcase: 1. Water bottle. Sometimes conference registration bags come with a water bottle. It might not this year, so bring your own. I also find it helpful to pack snacks such as protein bars, trail mix, etc. It’s easy to get lost in ed tech heaven, so stay hydrated and be prepared for those times you opted for a session instead of a lunch break. 2. Backpack. Unless you want to feel lopsided at the end of each day, plan to carry a backpack. I find it much more comfortable than lugging my laptop, iPad and all that fun swag in a shoulder bag. 3. A Large Suitcase or Extra Duffle Bag. Depending on how much swag you choose to collect, having extra room in your suitcase or an extra bag to carry home may come in handy. 4. Comfortable shoes. Your laps around the Convention Center will provide you with an unintended workout every day, so consider ditching the heels for something your feet will thank you for. 5. Labels. This one depends on whether you want to spend time on drawings and potential prizes. If this is not your thing, pass this one over. However, when you get your registration bag, you will find that it has lots of stuff to fill out - prize drawings, etc. There is usually an "Exhibit Hall Raffle Coupon Book" with about 100 coupons that require your contact info. If you plan to participate, print a few sheets of labels with your name, address, email, twitter handle and phone number that you can be reached on during the conference. 6. QR Code for your Badge. Although vendors will scan your official bar code, you may want to have your contact info linked to a QR code. Print this code and slip it into your plastic conference badge holder. As you connect with other attendees, they can scan and save your contact details. An alternative is to make the QR your lock screen image on your device, since you will most likely have the device handy at all times. Looking for More Tips? Join me at ISTE on Monday morning, June 29, from 8:30–9:00 am (PCC 108) for Curating the Conference: Tools & Tips to Maximize your ISTE 2015 Experience. This snapshot session is designed for conference first-timers and will provide you with effective conference habits that will transform your day-to-day practice once you return to your teaching and learning environment. |
|
0 Comments
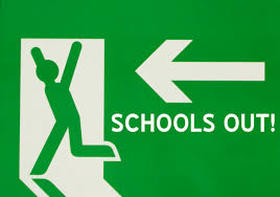 Alice Cooper's School's Out seems to be on a loop in my head which was a good reminder to write this post. We've all been getting bombarded with emails filled with end of the year & summer resources. I've been collecting them in one spot. Check out this collection of websites, apps, online courses and more and share with parents, or anyone that might find it useful. Most of the tools are geared toward K-5, but some are applicable to younger and older students. I'll continue to add to it throughout the summer. Have a tool to add? Leave a comment. Thanks!
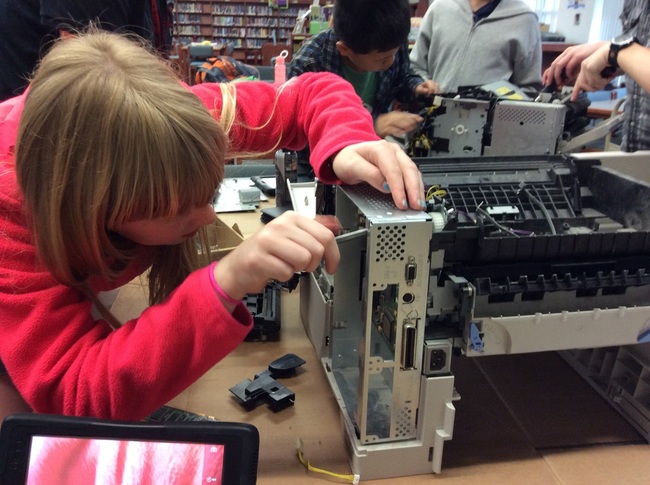
Summer Learning Tools for Kids 2015 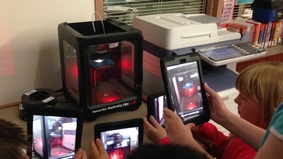 Since the hype of 3D printing has hit the education market, schools have scrambled to get their hands on printers, laser cutters and the like. My stance with any new type of technology is to answer the important questions of why and how - before jumping into the commitment of a sizable purchase. I firmly believe that many are quick to put the cart before the horse when it comes to new tech, programs and initiatives. Besides researching the tools, it's critical to figure out how they fit into your curriculum and overall plan for your school's initiative. Of equal importance is who. Who will make sure the device is used effectively? Integrated into instruction in a meaningful and purposeful way? Who will be responsible for maintaining it from a technical standpoint? Is funding available for filament and maintenance needs once the warranty expires? This is all part of the journey. I opted not to seek funding for a 3D printer this year, however I did want to expose my students to 3D printing. One of the ways I did this on a small scale was through a field trip to a neighboring school. Read more below. We also have exciting plans to expose ALL of our students to 3D printing later this month. More details in a future post. Makerspace & 3D Printing Field Trip In April, I took a group of fifth graders to a local middle school. Since the fall, this group of five students, have been part of my "Coding Crew", learning the Python programming language. Because of their involvement in programming, they helped to implement our school wide computer science initiative, Hour of Code in December. These 5th graders taught younger students about the importance of computer science and helped them learn how to use coding programs and apps. The field trip was a reward for the efforts of these students in promoting technology at our school. At Smith Middle, our group of students were led by the dynamic duo, Greg Garner, Instructional Tech Facilitator and Gabriel Grana, Teacher Librarian. They planned a rotation of four stations:
 |

AuthorDigital Learning/STEaM Consultant, Teacher, Mom, Maker, Lifelong Learner...sharing engaging ideas to leverage learning. Archives
April 2016
Categories |
 RSS Feed