As a technology specialist at an elementary school, I am often faced with the task of showing teachers how to use classroom technology in new and effective ways. All of the classrooms in our school are equipped with SMARTboards, and it is a challenge to ensure that these powerful tools are used as more than just glorified whiteboards. One major goal for our school this year was to increase student use of SMARTboards.
My priority was to put the Notebook software into the hands of the students so that they could be the creators of the slides used in their classroom. Students were provided access to manipulate slides in a variety of ways, including using the notebook software on student MacBooks or accessing the free web application of SMART Notebook Express or on iPads via the Notebook Express app. One of the methods we have explored is creating assignments that students could complete using one of these formats. With the release of the free web application, students can create Notebook slides from virtually anywhere, including outside of school as homework assignments.
Implementing this tool as a student product is relatively easy. FIrst, the teacher creates the initial slide or a template that they want their students to use as a starting point. This doesn’t even have to be a slide in Notebook, it can simply be a set of instructions for the students to follow. Then, if the teacher chooses to use a slide template, he or she emails the slides to the iPads. (I have a generic student account set up on our iPad sets, for this and other purposes.) The student opens the email and chooses to “open the file in Notebook”. Finally, the student completes the assignment and emails the files back to the teacher or uploads them to Dropbox. Another option is to have students present their work immediately after completion, by wirelessly displaying the student slides on the SMARTboard. For this, we have had success with the AirServer program, loaded on our teacher MacBooks. The student mirrors his or her iPad to the teacher laptop which is connected to the SMARTboard. This process has encouraged greater student accountability with the added measure of knowing they are sharing their work with the entire class upon completion.
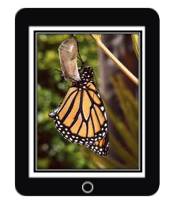
One of the great things about using Notebook as a platform for student assignments is that children already know the software because they see their teachers using it everyday. Although the ipad app and free web app have drawbacks (i.e., they provide a “light” version which does not include the gallery that Notebook users are accustomed to), the students exercise their creativity and have been able to use images from the web, pictures taken with the camera app, and drawings and diagrams created in other apps. In addition, it is important to note that files found on the SMART Exchange can also be opened in the iPad app and used with students (however, the user must be mindful of possible Flash incompatibility issues with certain files).
Using this teaching and learning method has opened up a world of possibilities for teachers and students. I have thoroughly enjoyed creating assignments and coinciding rubrics for Notebook projects. This method lends itself to any and all subject areas, and it has been a great tool for End of Grade Testing review. Instead of sticking to old school review books accompanied by drill and practice sessions, students have been creating review slides complete with images, and then presenting the information to their peers, which adds an extra layer to their learning.
My priority was to put the Notebook software into the hands of the students so that they could be the creators of the slides used in their classroom. Students were provided access to manipulate slides in a variety of ways, including using the notebook software on student MacBooks or accessing the free web application of SMART Notebook Express or on iPads via the Notebook Express app. One of the methods we have explored is creating assignments that students could complete using one of these formats. With the release of the free web application, students can create Notebook slides from virtually anywhere, including outside of school as homework assignments.
Implementing this tool as a student product is relatively easy. FIrst, the teacher creates the initial slide or a template that they want their students to use as a starting point. This doesn’t even have to be a slide in Notebook, it can simply be a set of instructions for the students to follow. Then, if the teacher chooses to use a slide template, he or she emails the slides to the iPads. (I have a generic student account set up on our iPad sets, for this and other purposes.) The student opens the email and chooses to “open the file in Notebook”. Finally, the student completes the assignment and emails the files back to the teacher or uploads them to Dropbox. Another option is to have students present their work immediately after completion, by wirelessly displaying the student slides on the SMARTboard. For this, we have had success with the AirServer program, loaded on our teacher MacBooks. The student mirrors his or her iPad to the teacher laptop which is connected to the SMARTboard. This process has encouraged greater student accountability with the added measure of knowing they are sharing their work with the entire class upon completion.
One of the great things about using Notebook as a platform for student assignments is that children already know the software because they see their teachers using it everyday. Although the ipad app and free web app have drawbacks (i.e., they provide a “light” version which does not include the gallery that Notebook users are accustomed to), the students exercise their creativity and have been able to use images from the web, pictures taken with the camera app, and drawings and diagrams created in other apps. In addition, it is important to note that files found on the SMART Exchange can also be opened in the iPad app and used with students (however, the user must be mindful of possible Flash incompatibility issues with certain files).
Using this teaching and learning method has opened up a world of possibilities for teachers and students. I have thoroughly enjoyed creating assignments and coinciding rubrics for Notebook projects. This method lends itself to any and all subject areas, and it has been a great tool for End of Grade Testing review. Instead of sticking to old school review books accompanied by drill and practice sessions, students have been creating review slides complete with images, and then presenting the information to their peers, which adds an extra layer to their learning.


 RSS Feed