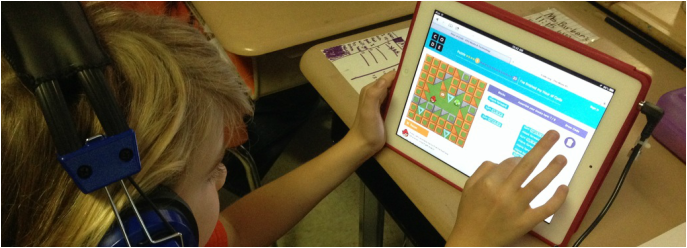
 Admiral Grace Hopper Admiral Grace Hopper Hour of Code is back and I am super pumped to have all 428 kids at my school participate! In case you aren't familiar, HoC is an initiative that aims to give every student the opportunity to try computer science for one hour. We did the Hour of Code with all students K-5 last year and it was an fabulous learning experience for all involved. It was incredible to see some of our kids that struggle with traditional reading & writing skills - take off with coding! The best part is that Code.org does such an incredible job preparing the tutorials that little preparation is required by the teachers. We just shared this year's plan for implementation at our last faculty meeting - actually my partner in crime and I couldn't be at the meeting, so we had them show this video in our place. The video highlights WHY HoC is important and what teachers need to know. We also featured a few students from our Coding Crew sharing their thoughts on coding. Their perspective is amazing. We shared this presentation with our staff too, so that on their own time they could read through the important stuff. Implementing HoC School-wide As our school's Instructional Technology Facilitator, I am the coordinator. I partner with our Gifted Education Specialist (and the other members of our STEAM team). I set up a Google Spreadsheet for teacher to sign up on. Here's a sample of ours. Very basic, but functional. Teachers sign up and during their hour time slot, 1-2 members of our STEAM team (the facilitators) come to their classroom with the iPad cart. Last year, in each classroom, we did a brief presentation about computer science, why it's important and some of the key women figures in the field (GO Admiral Hopper & Ada Lovelace!!). This was the presentation we used last year. We also shared a video from a former student of ours that is now a game designer. This year we plan to feature others in our community that are good role models for future careers in this field. Following our intro, students either used one of the code.org tutorials or an app. Check out our chart HERE, for the tools we used last year - broken down by grade level. This Year's HoC Tutorials I'm excited to try out this year's tutorials. I'm currently playing with the Beta version of Code.org's tutorial (featuring Disney’s “Frozen” heroines Anna and Elsa). The kids are gonna love this one! Try it now, HERE. HoC is just 3 weeks away! Hopefully your planning for HoC is going well. If not, it isn't too late to start planning a school-wide initiative now. Give this opportunity to ALL of your students...they deserve it.
Each year the Mobile Learning Network (formerly SIGML) hosts a session that blends tech tools and a walking tour of the host city. This year's tour took the form of a mobile scavenger hunt called PhotoQuest Atlanta! As the designer of this session, I wanted to make sure that, in addition to having fun and connecting with others, participants could implement this type of learning experience in their own schools and ed tech communities. The hunt was sponsored by Social Scavenger - their app was a perfect fit for the goals of this session. Read more... on my blog post on ISTE's website by clicking HERE.  Hopefully you have made it back to your hometown safely and took a break from EdTech for at least 24 hours. But before you get too far away from it, what's next? How is all that you learned going to change the way you teach, coach or learn? Are you feeling a little overwhelmed by the mass quantity of handouts, business cards and (mostly) useless trinkets you collected that just seemed to vomit themselves out of your suitcase? Maybe the notes from my "Curating the Conference" session can help your sort through the chaos and create a doable plan. You check out the abbreviated slides and notes from Sunday's session HERE. Happy sorting! 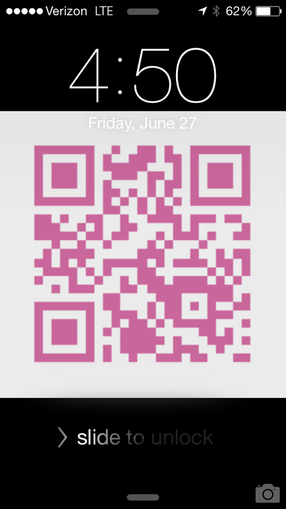 Over the last few days I've been tweaking my session: Curating the Conference: The Cure for Information Overload and I'm super excited to share the tools and tips I've learned over my last 7 trips to the ISTE conference. I've condensed the lecture piece of the session and built in some time to give participants a chance to put the tools to work and get themselves organized. So, if you are new to the conference or already overwhelmed by all the info flying around, come get 10+ takeaways to help you make the most of your ISTE experience on Sunday morning at 11. I'll also be bringing along a few "conference survival" treat bags for 15 of the attendees. Here's a quick newbie tip to use right now: Create a QR code that links to your contact info or website and make it your screensaver on your mobile devices. This will make it handy for people to scan. I've also read about people printing it and placing it in your badge holder for easy scanning. However you decide to give and collect contact info - be sure to keep it organized so it makes sense later. More on that Sunday... Sunday's Session Info: Curating the Conference: The Cure for Information Overload Sunday, June 29, 11:00 am–12:00 pm GWCC B309 Digital Age Teaching & Learning / Listen and Learn: Lecture Free Tools I Like for QR Creation/Scanning: I-nigma - for scanning QR Code Generator: http://www.qrstuff.com  The countdown is on. ISTE starts in less than a week! This year I am excited to have three classroom teachers coming with me - all are first-time ISTE attendees. In an effort to help them get ready and anyone else that may want some packing tips, here goes... 1. Labels! As old school as it sounds, in years past, I wish I had printed a few sheets of labels with my contact info, etc. Business cards are great to have too, but labels are handy. When you arrive at ISTE and get your registration bag, you will find that it has lots of stuff to fill out - prize drawings, etc. There's usually an "Exhibit Hall Raffle Coupon Book" with about 100 coupons that require your contact info (if you choose to play). If you are into that kind of thing, save your cards and your time - by affixing labels where contact info is needed. 2. Water bottle. Your ISTE registration bag used to come with a water bottle. It didn't last year, so bring your own just in case. It is helpful to have throughout the day...especially in the southern heat. I always pack snacks too. 3. Backpack. Unless you want to feel lopsided at the end of each day, bring a back pack. I find it much more comfortable than lugging my laptop, iPad and all that fun swag in a shoulder bag. 4. An Empty Suitcase or Duffle Bag. That fits inside your suitcase. This way, if you need to check an additional bag upon return home, you have one. There are MANY times I wished I had a better way to carry all my junk home. 5. Comfortable shoes. Seriously. Your feet will thank you. Safe Travels! See you in Atlanta. 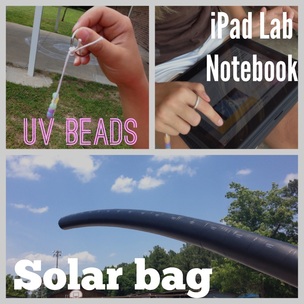 Our elementary school STEAM Team implemented an exciting Heat Transfer unit with our fifth grade students in May. Students investigated the topics of radiation, conduction and convection with a series of experiments and observations to help them gain a better understanding of heat transfer. Over three afternoons, students rotated through twelve stations designed to be hands-on investigative experiences and experiments. Each small group of students recorded their thinking and learning using an iPad as their Lab Notebook. In it they documented the experiences with videos and photos and took notes using text, labels and voice recording. One fifth grader commented that "I thought it was great because I am a hands-on learner and there was lots of that. This lab idea really "up-ed" my learning! It was a very fun experience to see science through all the stations and understand it better." I love creating videos to use as introductions for assignments and projects. They are a great way to get kids excited, and provide both teachers and students with instructions and guidelines that they can refer back to whenever they need to. This video did just that. The kids love seeing an avatar instead of their teachers. I created this video with Tellegami, iMovie and Book Creator for this video.  One of our second grade teachers (Courtney Sears) created a tech integration project for her second grade weather unit. After the class studied weather, student groups researched different types of severe weather and used their findings to write scripts for a weather report. Using iPads, they recorded their news-style "weather reports" live on location, complete with props and sound effects using the Green Screen FX app. Great use of technology as a creation tool! Check out a few examples below. |
AuthorDigital Learning/STEaM Consultant, Teacher, Mom, Maker, Lifelong Learner...sharing engaging ideas to leverage learning. Archives
April 2016
Categories |




 RSS Feed